Signals
Game Manual
- Basics
- Game content
- Infrastructure
- Vehicles
Contents
Purpose
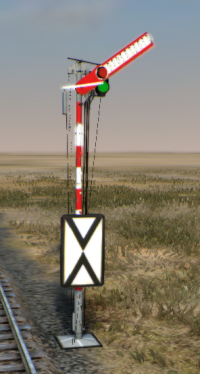
Signals prevent trains from crashing into each other while driving on the same track and it is for this reason that they are an important part of any railway system - safety first guys!
A signal divides a railway line into two sections known as blocks. If a block is occupied by a train then the signal dividing these blocks won't allow any other train to enter that occupied block until this block is cleared.
There are currently two kinds of signals:
- block signals
- chain signals
Placing of signals
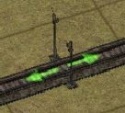
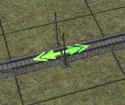
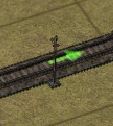
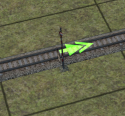
- one (the first) left mouse button click = two way signal will be placed on a railway track
- two (a second) left mouse button click on the same signal = two way signal will be transformed to one way signal
You decide which way a one-way signal will orientate by which side of the track you click. Yes, this might at first come across as slightly difficult, but zoom in and you'll soon get the hang of it.
The game defaults to automatically selecting which type of signal to place, as well as defaulting to two-way signals. You can change to manual selection as well as one-click one way signals in Game Settings.
There is a multi-signal tool which lets you place several signals evenly spaced out. Convenient on longer stretches of track! (The tool even lets you change the spacing - if you want a signal every four squares, or five, or eight... Each signal costs a small amount of money)
Signals cannot be placed at station platforms and directly on railway intersections. Signals are hard to place in tunnels, but you can get around this by using the multi-signal tool: it will space signals correctly to allow for efficient use of longer tunnels. (It is admittedly hard to delete those signals without deleting the whole expensive tunnel though)
Different kinds of signals:
Block signals explained
Block signals allows access only on the blocks which are not occupied by other train. Block is the space of railway between two signals. You can see the block status with the arrows pointing towards the segments. Red arrow means that the block in the arrow direction is occupied.
Block signals basics
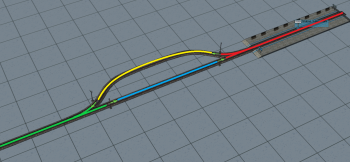
On the right picture you can see our example station situation. Each block is located between two signals / end of the track and colored with different color. Red is the station block, blue is the entry block, yellow is the exit block, and green is the rest of the track. This way, one train can approach the station from the left while another train can leave from the station.
You can notice that the station block is now split into two tracks with two one-way singal. One "entrance" signal, one "exit" signal. The incoming train will enter from the green block to blue block. Then the train enters the station, the red block. Next incoming train will have red sign on the entrance signal, because of occupied red block and it will wait in the blue block, while the first train will have space to leave through the yellow block. This is effective enough on the low load railroads.
Common mistakes
| Image | Information |
|---|---|
| |
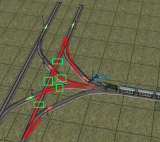
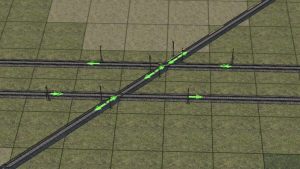
Crossings with not enough signals - the whole red area is single block and can be occupied by only one train. That will make that crossing very ineffective. For it to work better, there need to be 6 more signals (marked by green rectangles) |
| |
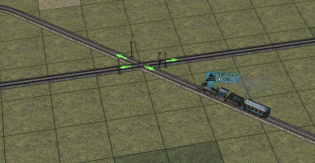
As practical example of the Not enough signals, train could block itself in such block. For this train to move at all, there must be more signals placed in marked rectangles. |
Correct signals
Here are a couple of correctly configured signals, where "correctly" means that trains that just run past each other won't stop/block each other. (Obviously if a train needs to switch tracks other trains are stopped)
| Image | Information |
|---|---|
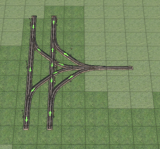
| Trains at both intersections will run correctly. They will not block the intersection and the ride will be smooth. | |
| Trains at both intersections will run correctly. They will not block the intersection and the ride will be smooth. |
For more examples of intersections, see Junctions page.
Correct use of bi-directional signals
To prevent trains from getting stuck nose-to-nose at bi-directional signals, they have to be placed very carefully. There are basically only two situations where they should be used:
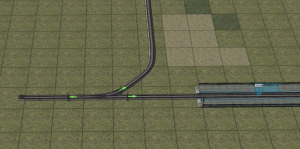
- Single track lines with only one train going back and forth. Here such a line crosses a main (double-tracked) line. Without the crossing, there wouldn't have to be any signals on such side line. But to prevent above described self-block, there must be signals on each segment. Since the track is used in both directions by one train only, these must be bi-directional signals. (If there is more than one train using such sideline, bridge must be used instead so no signals would need to be placed; otherwise the trains would get stuck nose-to-nose at the bi-directional signal eventually.)
- Terminal station (no trains entering the station from the other end) with multiple platforms. If you send more trains than the number of platforms, please see chain signals below.
Chain signals explained
Definition
Chain signal will be green if there is at least one green signal behind it.
While it sounds complicated, it simply means that the signal will "look" down the line at the next signal (or signals if there is a switch and multiple tracks) and if it sees all red, it will be red, if it sees at least one green, it will turn green.
It should be noted that incorrectly placed chain signal where block signal should be will not cause an accident, but it will make the trains wait longer, thus the rail network will be less efficient as a whole.
Correct use
There are three main situations where chain signals are needed:
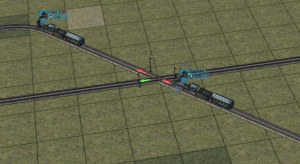
- At crossings to prevent train from blocking the crossing, if the train cannot continue beyond it. Correctly placed signals are Chain before the crossing and Block after the crossing. If the track after the crossing is empty -> the block signal is green -> the chain signal before the crossing is green. If the block after the crossing is occupied -> the block signal is red -> the chain signal before the crossing is red as well so next train won't enter the crossing thus it will not block the traffic on the other track. For instance, imagine the upper left track leading to an off-screen loading station, and the first train is waiting its turn. The second train will not enter the crossing (and block it) while it waits behind the first train, thanks to the chain signal.
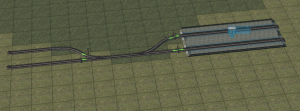
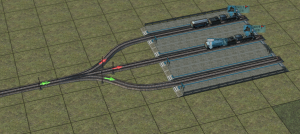
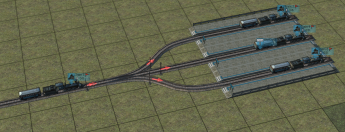
- At the switch where train can choose any tracks and should wait for the first available, if all of the tracks are occupied. Most common use is at multi-platform stations (assuming all platforms are equal, i.e. every track leads on to every possible destination). Take this three-track station below (assume tracks continue after the station). Imagine all three tracks being occupied and a fourth train arriving. Without the chain signal, the fourth train would choose one station track, and enter it stopping until the train of that track leaves the station. Even if both the other two trains leaves the station first, this fourth train has already chosen its track, and will wait until that track becomes available. While it does so, it blocks the junction and therefore all traffic. With a chain signal instead, the train will stop before the junction, and once any track becomes available, the train will choose that track. This is obviously more efficient and removes a common source of blocked stations.
- Terminal stations. Wherever you use bi-directional signals on a stretch of track used by more trains than there are platforms, you need chain signals to avoid trains eventually getting stuck nose-to-nose. In this example (taken from the section on bi-directional signals above), as soon as you have three trains (one more than two, the number of platforms) you need to replace the incoming block signal with a chain signal.
Common mistakes
- placing the chain signal at a switch that doesn't offer a true choice (aka each track after the switch leads to a different destination). The chain signal here will be useless and will work as less efficient block signal, since each train will choose the track leading to its destination, ignoring the other track.
- placing chain signal at the exit track of the crossing. There is absolutely no harm in doing so, but the train will needlessly wait for whole another block to be clear while it could have been moving already.
Chaining chain signals
It is worth mentioning that by its very nature (the signal looking ahead one signal) that you can chain chain signals! That is, if you place a chain signal in front of another signal, now that signal will show the aspect (red or green) the signal two signals ahead is showing! There is little practical use of this, however, and you should find that in most situations the chain signal in the middle could just be removed.
Just about the only usage is esthetic: Real life railways create blocks of track over multiple signals (such as when a train is to cross multiple tracks such as at yard entrances and exits), and you could try experimenting chaining chain signals to mimic this appearance. In effect, chain signals allow you to place "redundant" signals in complex crossings since a chain of chain signals effectively act as a single block.
Ignoring signals
Trains will never run a red signal by themselves. The only crashes that can happen on a correctly configured network is rail/road crashes, simply because trains can move much faster than road vehicles.
Trains can deadlock, however, sometimes in big jumbling messes. While this suggests a less than optimal signaling regimen has been used, before you can fix the mess you need the trains to untangle. Tools you might find useful in these situations are the buttons in a train's window for reversing trains and instructing trains to ignore the next signal (sometimes in combination). Obviously you need to carefully manually supervise the train's passage because when a red signal is ignored, a crash can very well occur.
Do remember that only the very next signal is ignored. You might have to press the button more than once if the red signal you need the train to pass by is several signals ahead.
